Enable WhatsApp Notifications on your Shopify
Enable WhatsApp Notifications on your Shopify eCommerce for Orders and status changes.
Send WhatsApp notification messages for Orders and status changes to increase engagement with your customers through our free integration for Shopify.
Generate your Whatsapp API on WoSocial :
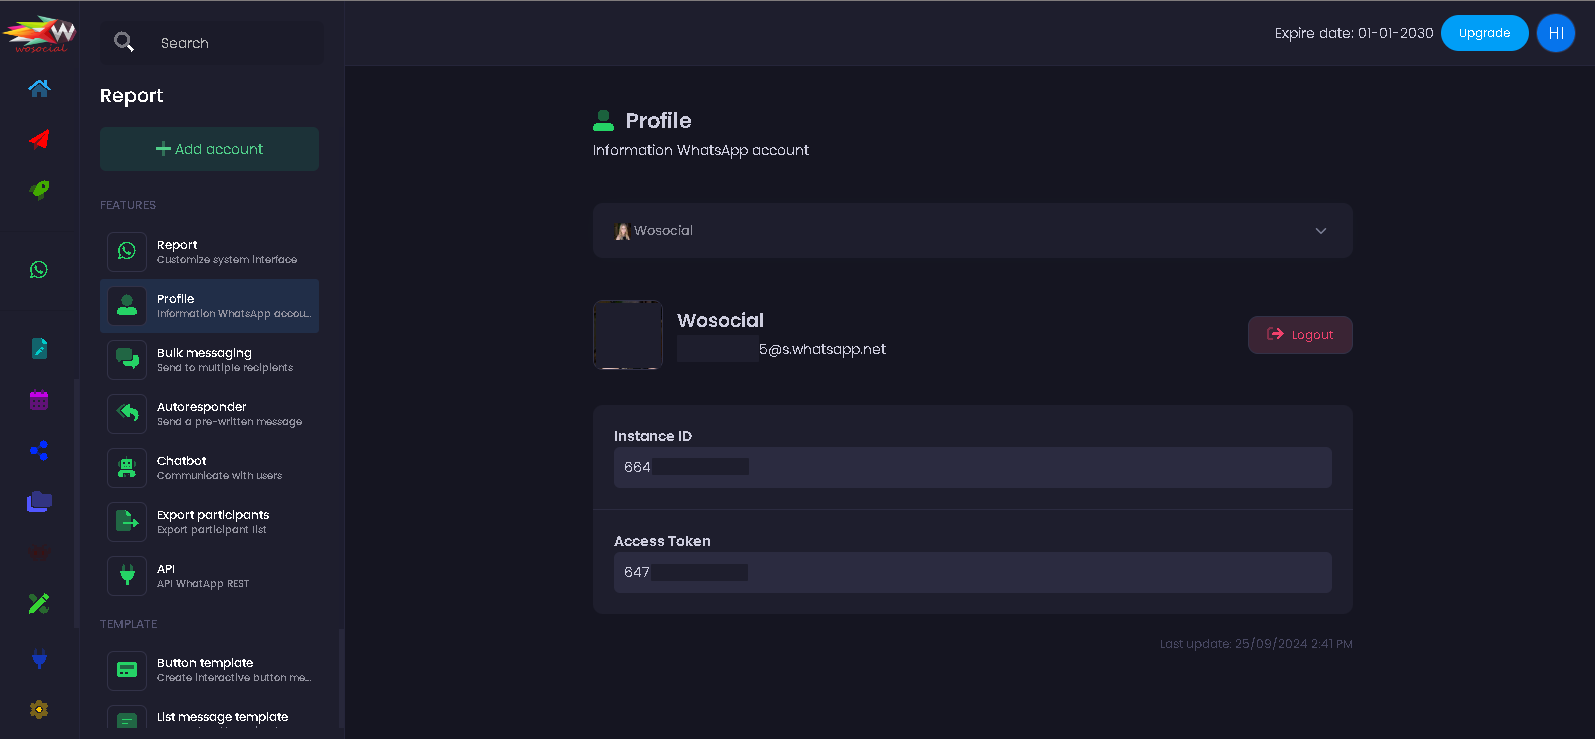
Log in or register on WoSocial and create an instance with your WhatsApp Business account.
After creating the instance you can copy your Access Token and your Instance ID to paste it in the Shopify webhook configurator Go to Webhook
Configure notification messages :
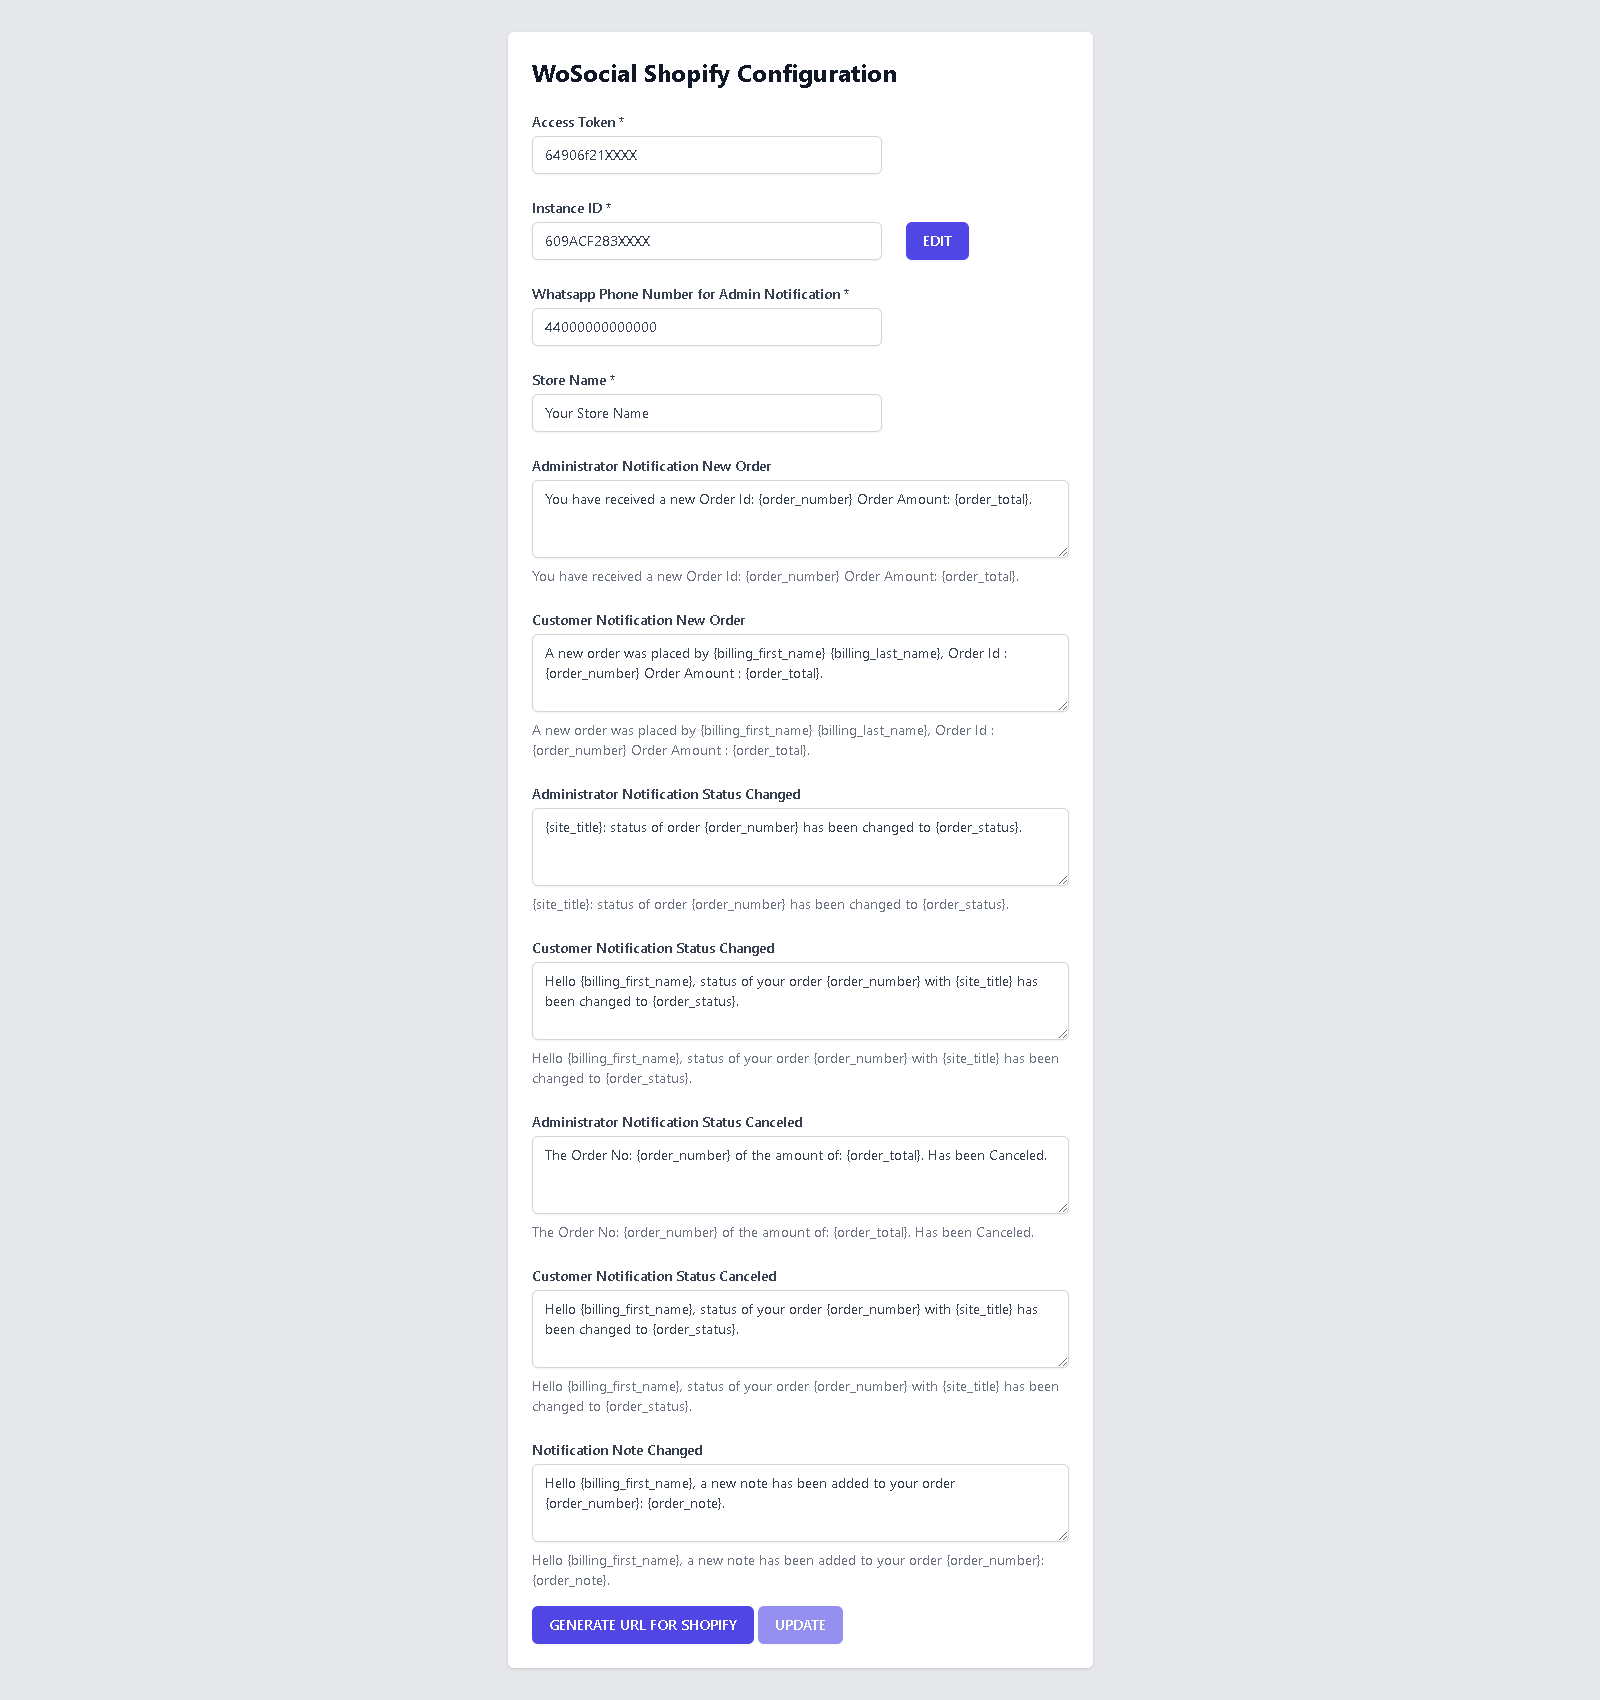
Message configuration
Go to the webhook configuration Webhook to customize the notification messages you want to send to your customers. If you want to modify the messages of an already existing account after entering your access token and the instance id, press the EDIT button, your notifications to be modified will appear. In the Whatsapp Phone Number for Admin notification field you must enter a WhatsApp phone number including the international prefix without any sign, dash or parenthesis. On this number you will receive notifications as an administrator. When you have finished customizing you have to click the GENERATE URL FOR SHOPIFY button, the custom url will appear to be entered in your Shopify administration.
Configure Shopify to send notifications
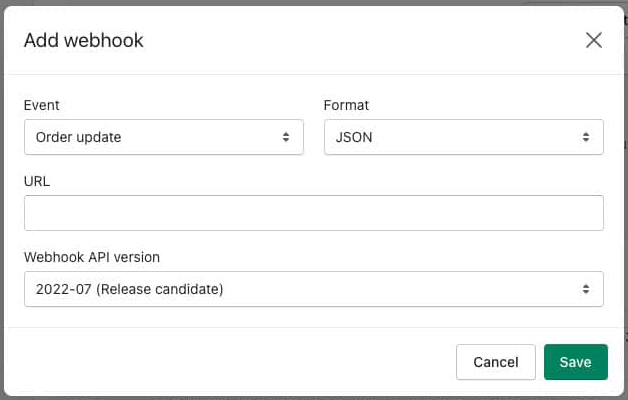
Shopify Notifications Setup
Log in to your Shopfy administration, go to Settings / Notifications at the end of this page you will find the section Webhook click the Create Webhook button. Select from the events "Order Update", Format "JSON", paste the WoSocial url in the URL field, select Webhook API version 2022-4 (Latest) from the menu.